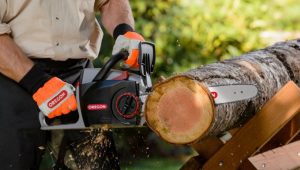
Nothing is perfect, not a single thing has ever been built that can last forever; the same can be said about your chainsaw. Your chainsaw will need constant maintenance and its chain will either need to be sharpened or replaced eventually.
In this article, I will tell you all there is that you need to know about putting a chain on your chain saw in Australia.
You will be better off teaching yourself how to change a chain instead of having to have to go to the workshop every time something goes wrong with it. It is better for you in terms of saving time as well as saving money.
Read Also: Why Were Chainsaws Invented? The Truth Behind a Great Invention
Even though the steps for replacing a chain on a chain saw are fairly simple and the entire process takes less than 5 minutes, complete knowledge about each aspect can make the difference between a correctly configured chain and a poorly configured one.
Read Also: Best Chainsaw in Australia for Cutting Firewood | Large to Small Trees
The only tool that you will be needing for this process is a scrench that comes with your chain saw and if you don’t have it, a flat-head screwdriver or a socket wrench will serve you just fine.
Step1:
The first step towards replacing a chain is obviously, getting a similar new chain that you will replace the older one with.
Read Also: 5 Best Miter Saw In Australia – Top-Rated Picks
Step 2:
Secondly, you need to loosen all the screws and remove the older chain. You will do this by, first of all, removing the guide bar, then the plate that covers the chain, and then after releasing the chain tension, taking the chain off carefully.
How to Change the Blade on Your Miter Saw in Australia?
Step 3:
Clean the saw carefully from the inside out taking care of any excess grease or debris that might have managed to get within the gaps.
Step 4:
Find the tension screw. It will be by the side of the guide bar and loosening it will make it easier for you to install the new chain.
Read Also: Electric VS Gas Chainsaws Australia: The Differences You Need to Know
Step 5:
Repeating the process of taking off the chain but in reverse, carefully place the new chain around the chainsaw’s clutch drum while making sure that the drive’s link fits perfectly in the sprocket.
See Our: Best Chainsaw Mills in Australia – Ability to Handle the Hardest Woods
Step 6:
Now you need to align the guide bar. After threading the chain along the guide bar, clutch and drum, you need to add some tension to it by pulling the guide bar away from your chainsaw. Make sure that you pull it away just enough to seat it onto the adjustment pin.
Read Also: 5 Best Miter Saw Blade in Australia – Top Rated Picks
Step 7:
Put the side plate back in its place and put the nuts and bolts in their places on top of the plate, but don’t tighten them yet. You need to adjust the tension in the guide bar before doing that.
Step 8:
Use the tightening screw to adjust the tension of the chain and the guide bar.
Read Also: Best Small/Mini Chainsaws in Australia
Step 9:
At last, finish by tightening the nuts on the plate and putting the guard back on.
Conclusion:
Now, your chainsaw chain replacement is complete, and you can use it to fulfill all your cutting requirements.
Try all the steps one by one and make sure to follow all the safety precautions before the whole procedure.
Good Luck!!